Set Project Defaults for Boundary Layer
Each GeoSWMM 2D project has a set of default values unless overridden by the user. For any 2D project, default values for the boundary layer are available in the Project Defaults dialog form, alongside other standard tabs. To set default values for a GeoSWMM 2D project, follow these steps:
-
Go to the Settings in the menu bar and select Project Defaults.
-
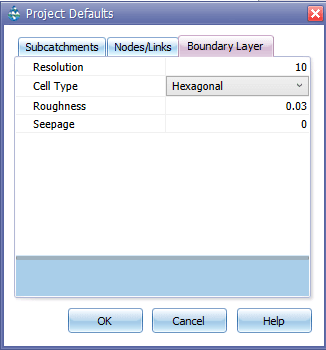
The Project Defaults dialog will appear. Boundary layer default values are grouped under the Boundary Layer tab.
-
Set the desired values for the respective parameters and click “OK” to save the settings.

Fig.144: Project Defaults for Boundary Layer
These parameters are used in defining boundary layer properties and creating corresponding 2D layers. If the user does not change the default values for these parameters and save them, boundary layer features will have these properties, and 2D layers (e.g., junctions, conduits) will be created accordingly.
Table 19: Definition and default attribute values for Boundary Layer
Boundary Layer Attributes | Default Value | Detail | |
Resolution | US Customary | SI Metric | Size of each cell |
10 | 3 | ||
Cell Type | Hexagonal | Type of cell geometry | |
Roughness | 0.03 | Manning’s roughness coefficient | |
Seepage | 0 | Rate of seepage loss into the surrounding soil | |
