Set Simulation Options
The next step is to define simulation settings in the model. Depending on your analysis scopes and objectives, these settings will vary among different simulation scenarios. To set the model simulation properties:
-
Select Options in the Model Object Panel and click on the Properties (
) button to open the simulation setting editor. Notice that the General page is displayed by default in this editor.
-
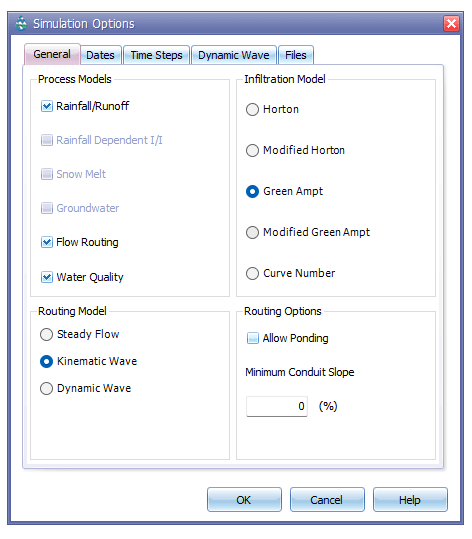
Set the properties of the General page as shown in the following figure. The infiltration and routing models specified in this model are Green Ampt and Kinematic Wave respectively.

Fig 21: General page settings in Options editor
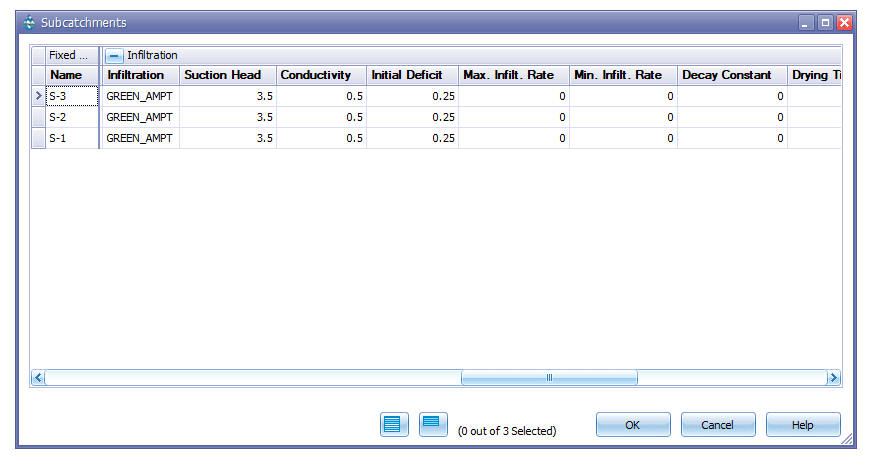
- To set the Green Ampt infiltration parameter values to the subcatchments, exit from the Options editor and go to the Model Object Panel. Then open the subcatchment table. In the table, expand the field Infiltration. Then assign the following parameter values to all subcatchments.
Table 4: Green Ampt infiltration model parameters
Parameter | Value | Unit |
|---|---|---|
Suction Head | 3.5 | inch |
Conductivity | 0.5 | in/hr |
Initial Deficit | 0.25 | unitless |
- Now the subcatchment property table should look like the following figure. Click OK to accept the changes and exit from the table.

Fig 22: Subcatchment infiltration properties
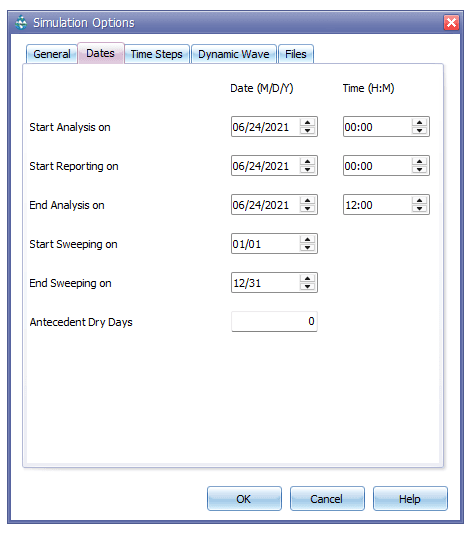
- Reopen the Options editor. Go to the Dates page. Set End Analysis time to 12:00 hours. It should look like the following figure.

Fig 23: Dates page settings in the Options editor
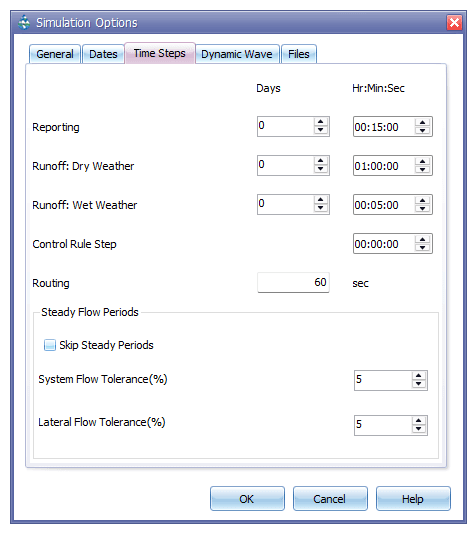
- Then go to the Time Steps page. Set Routing time step to 60 seconds. At this stage the page should appear like the following figure. Then click OK to accept the changes made in simulation settings and exit from the editor.

Fig 24: Time Steps page settings in the Options editor
- Now save the project. The model is now ready for simulation. Click on the Run Project () to simulate the model. On successful model run, it will execute the following message. Click OK to accept.


Fig 25: Simulation status form
